Friday, 2 January 2009

Fitting the sashes

I was glad I had practiced this as time was running out, it was getting colder and I just heard the weather forecast for up to 60 mph winds and heavy rain.

The cords feed over the pulleys and then the top sash is lifted so the weight can be attached.


The Lead weights first as they have a hole running all the way through then the iron weight tied on so so it just clears the bottom of the box.

The parting bead can then be driven in. I had pre-painted these and it was a good tight fit. May be too tight if I ever have to remove them.


The bottom sash goes in exactly like the top sash. Just in time as the rain started coming down.


Next day I fitted the pocket covers and Staff beads. Then another few days latter I finish it off with some architrave.


Fitting the New Frame

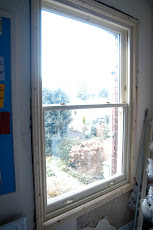
The frame eventually jiggled in quite nicely.


To lift the frame up from the stone cill I fitted a piece of squashed copper pipe under it. This went to about 35mm of the front edge. Just behind the drip groove. I sealed it with silicone later on. The idea behind this came after seeing Zinc strips under old window allowing the timber window to move with expansion and contraction whilst maintaining a seal upstand on the stone cill.


The whole frame is held in with four screws fitted at angles through the each corner into the brick work.

Taking the old window out

With a full day allocated for the job and assistance from Dave on hand we went past the point of no return and ripped the old window out.

Leaving us with the reveal looking like this.


After about an hour chiseling the brick work to get rid of the high spots the frame would just squeeze in.